


Up to 5-Year Part Warranty
Need Replacement Parts?
Download Guides
Title
Unboxing
What's inside your box.


Title
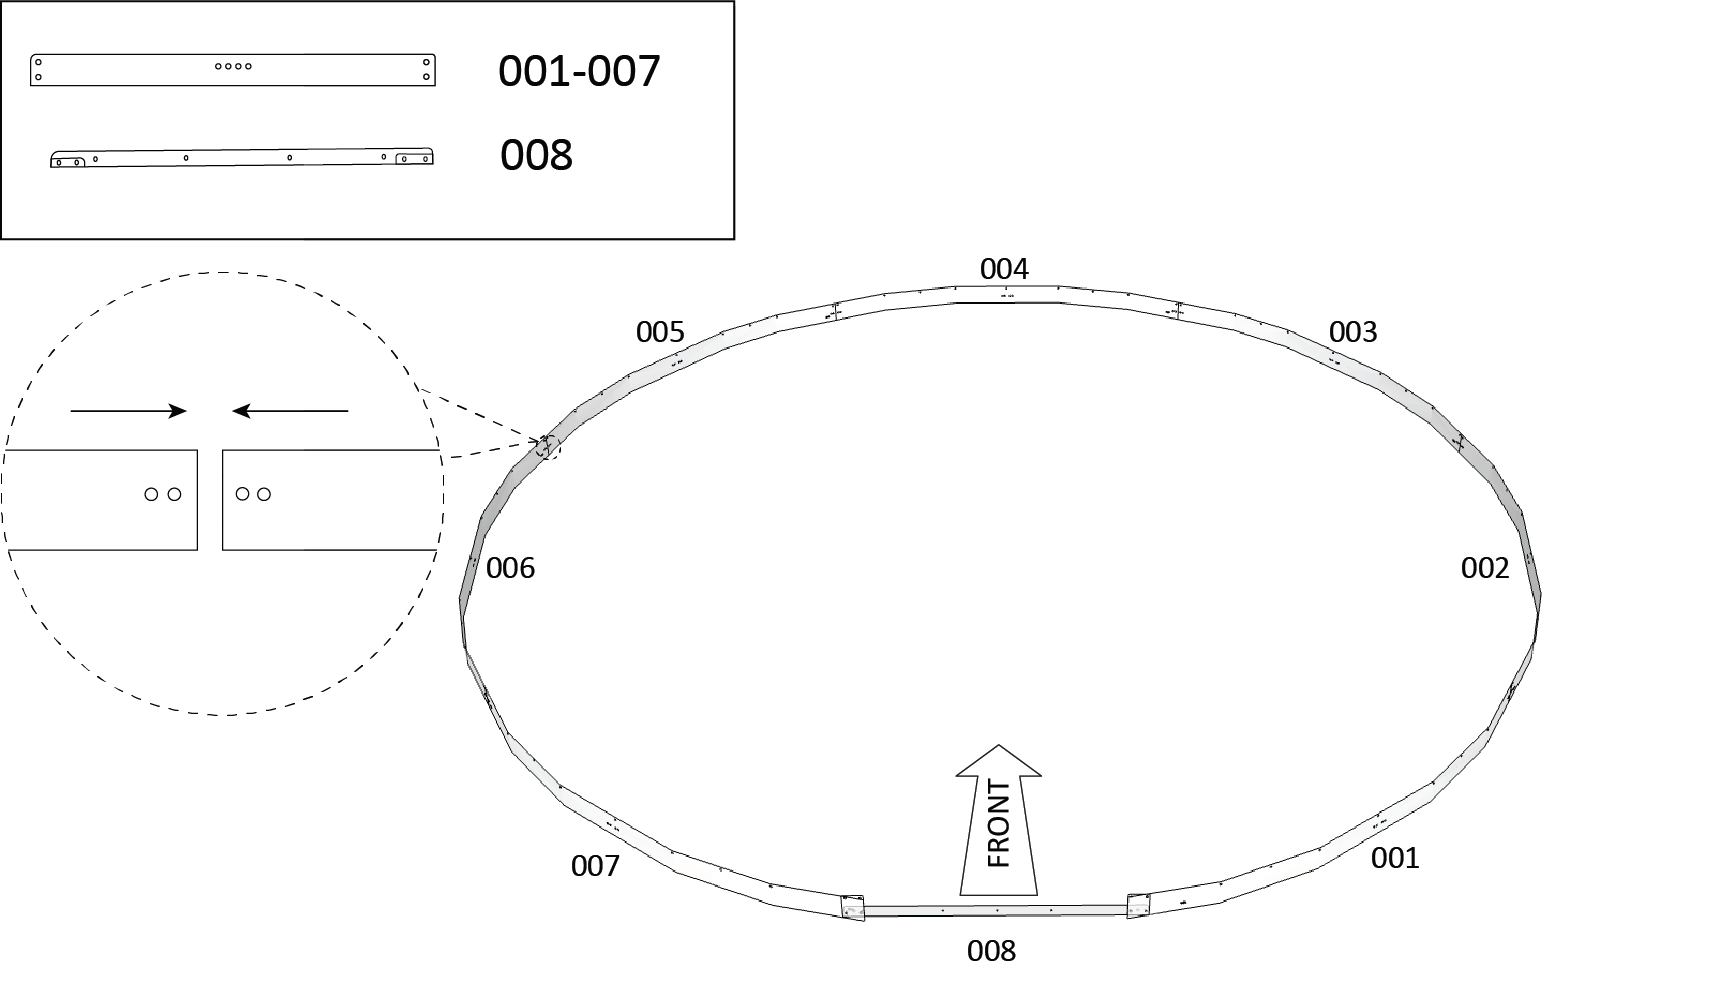
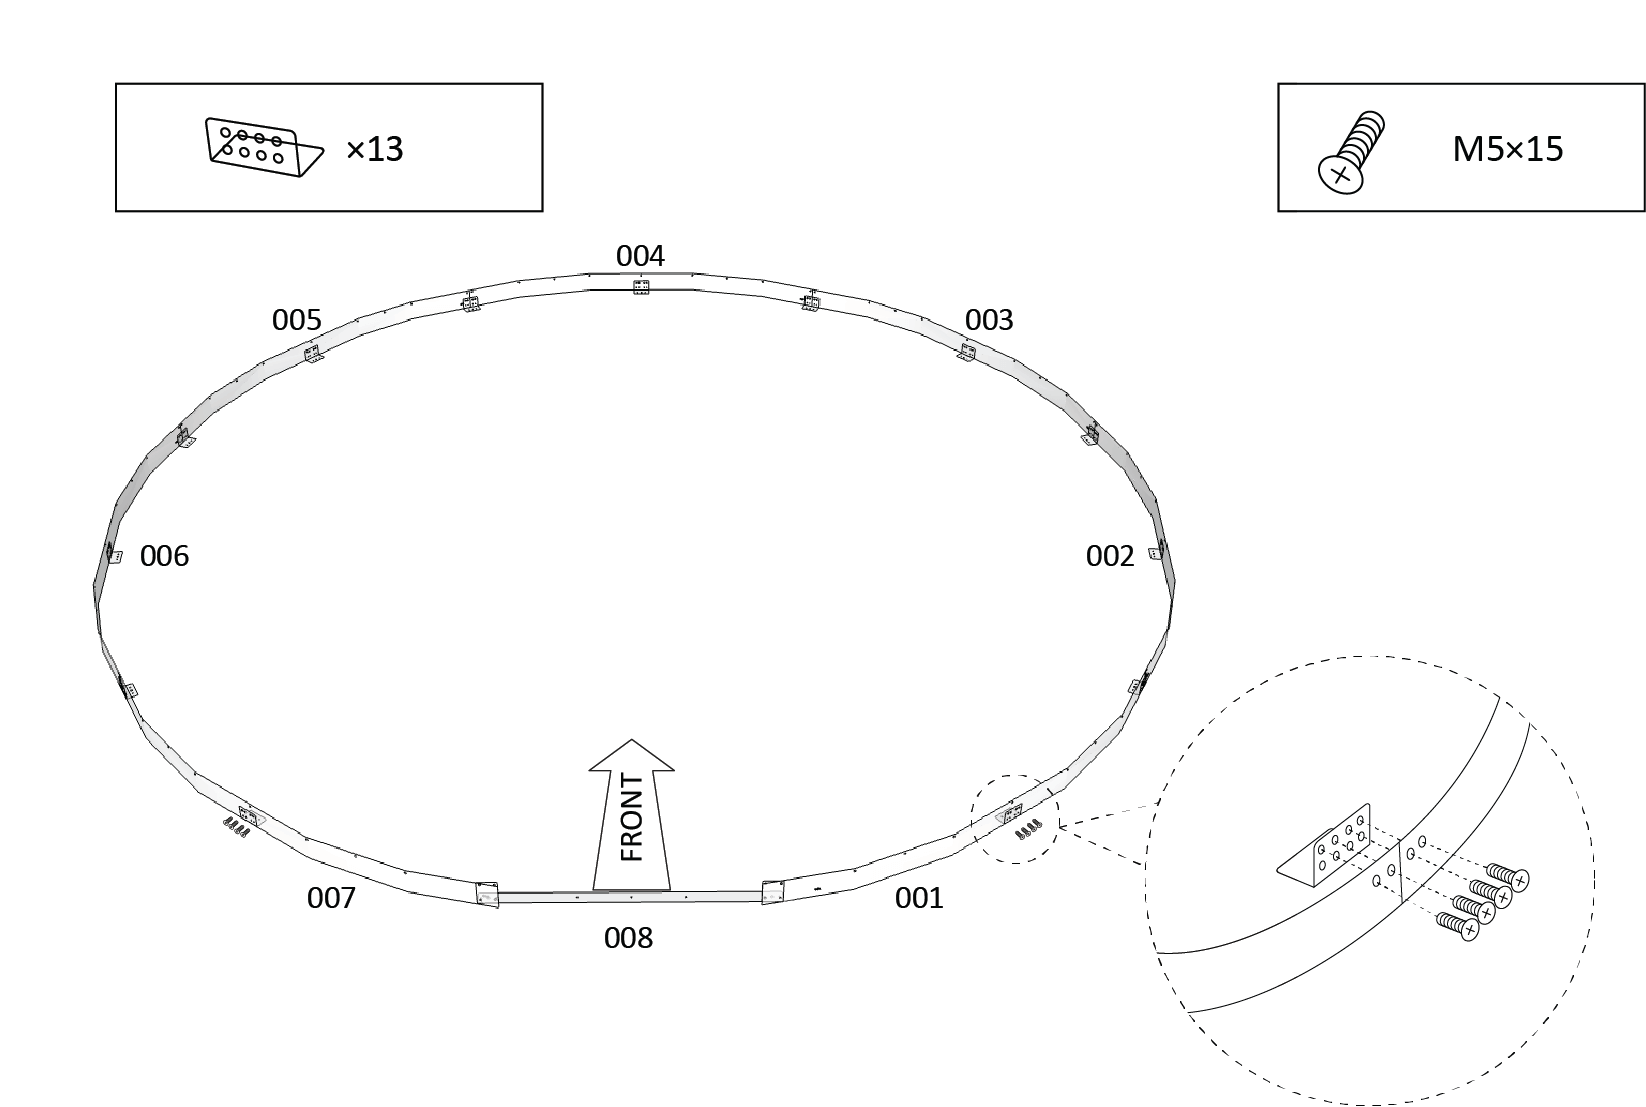
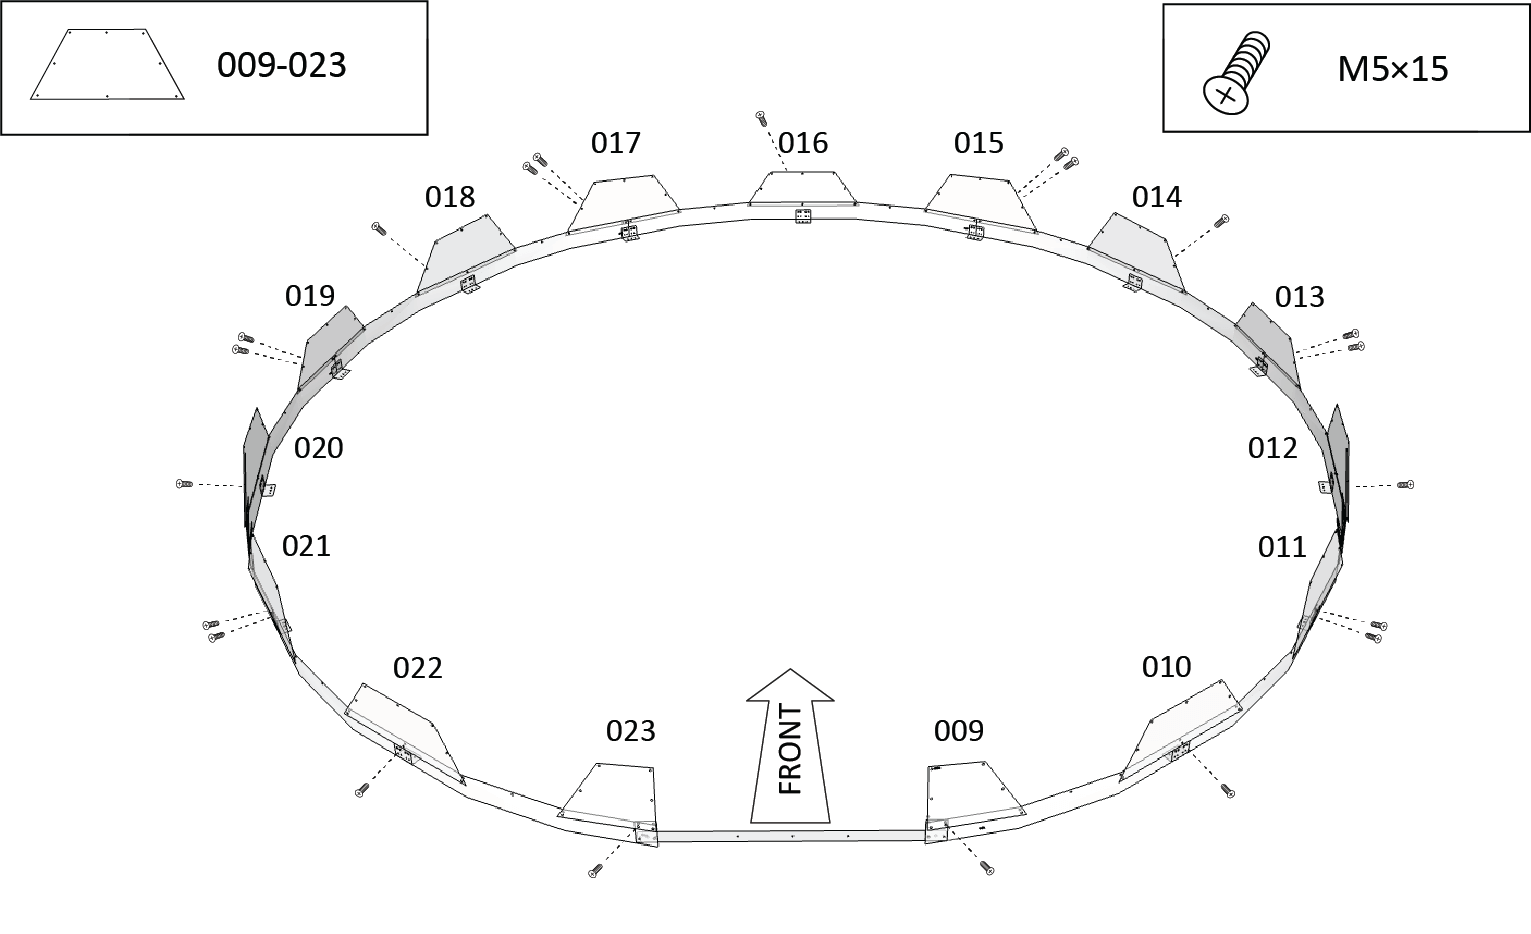
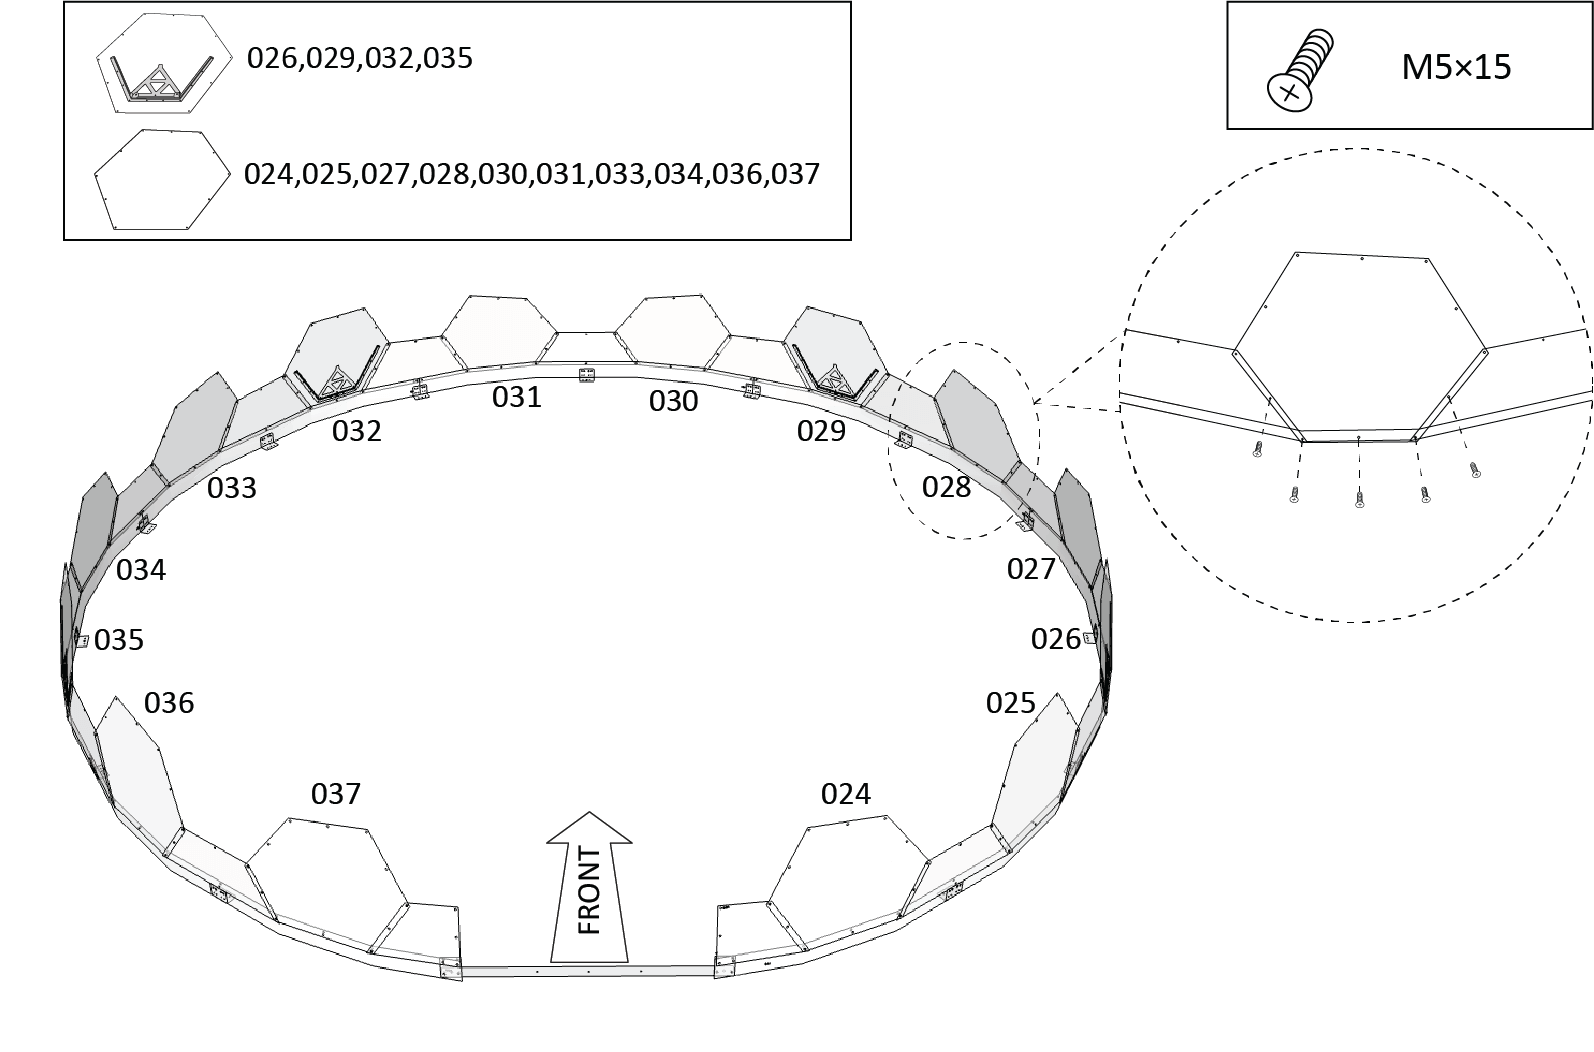
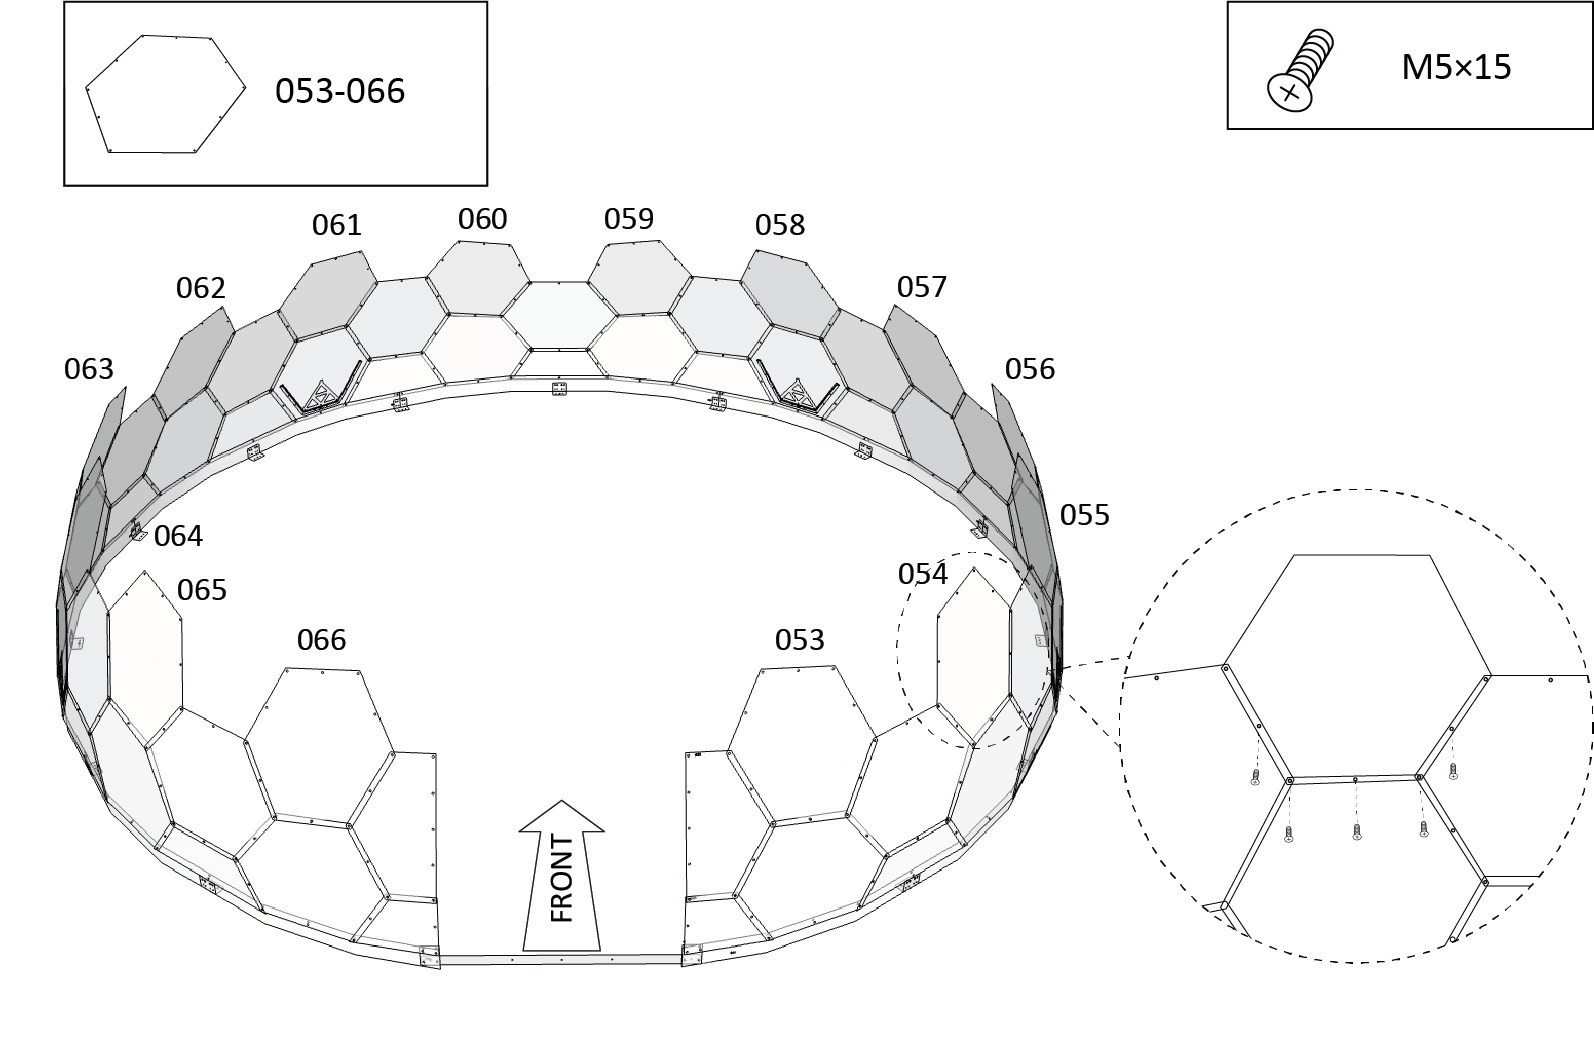
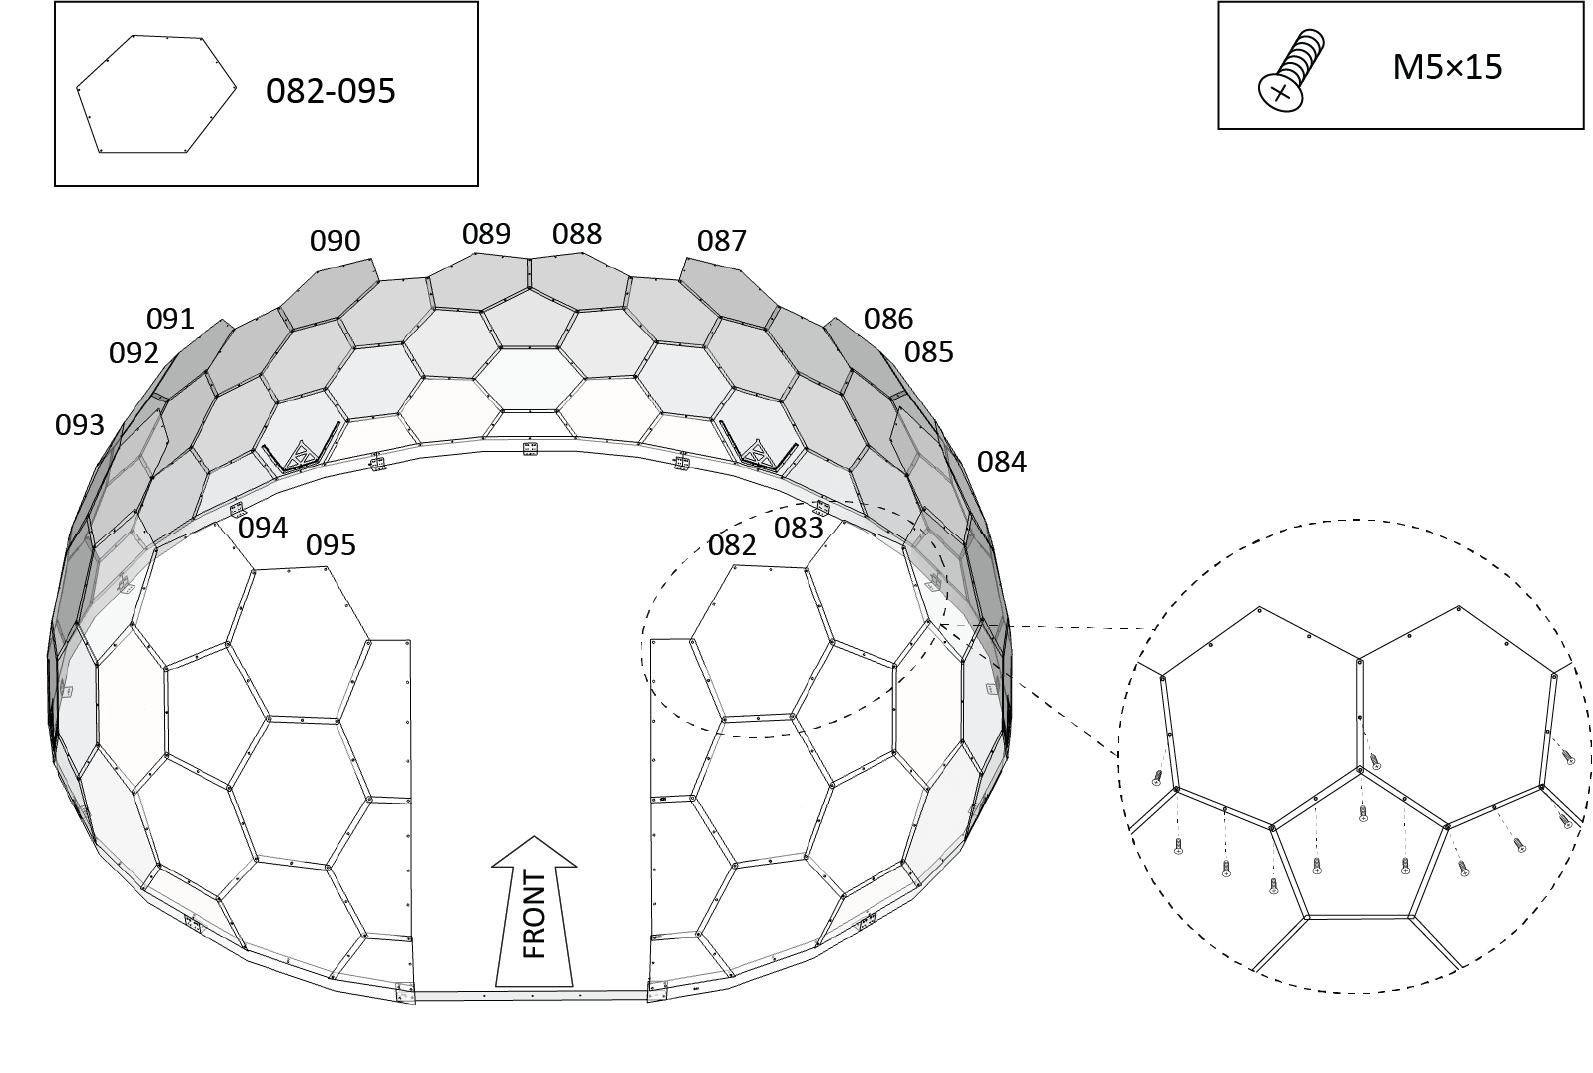
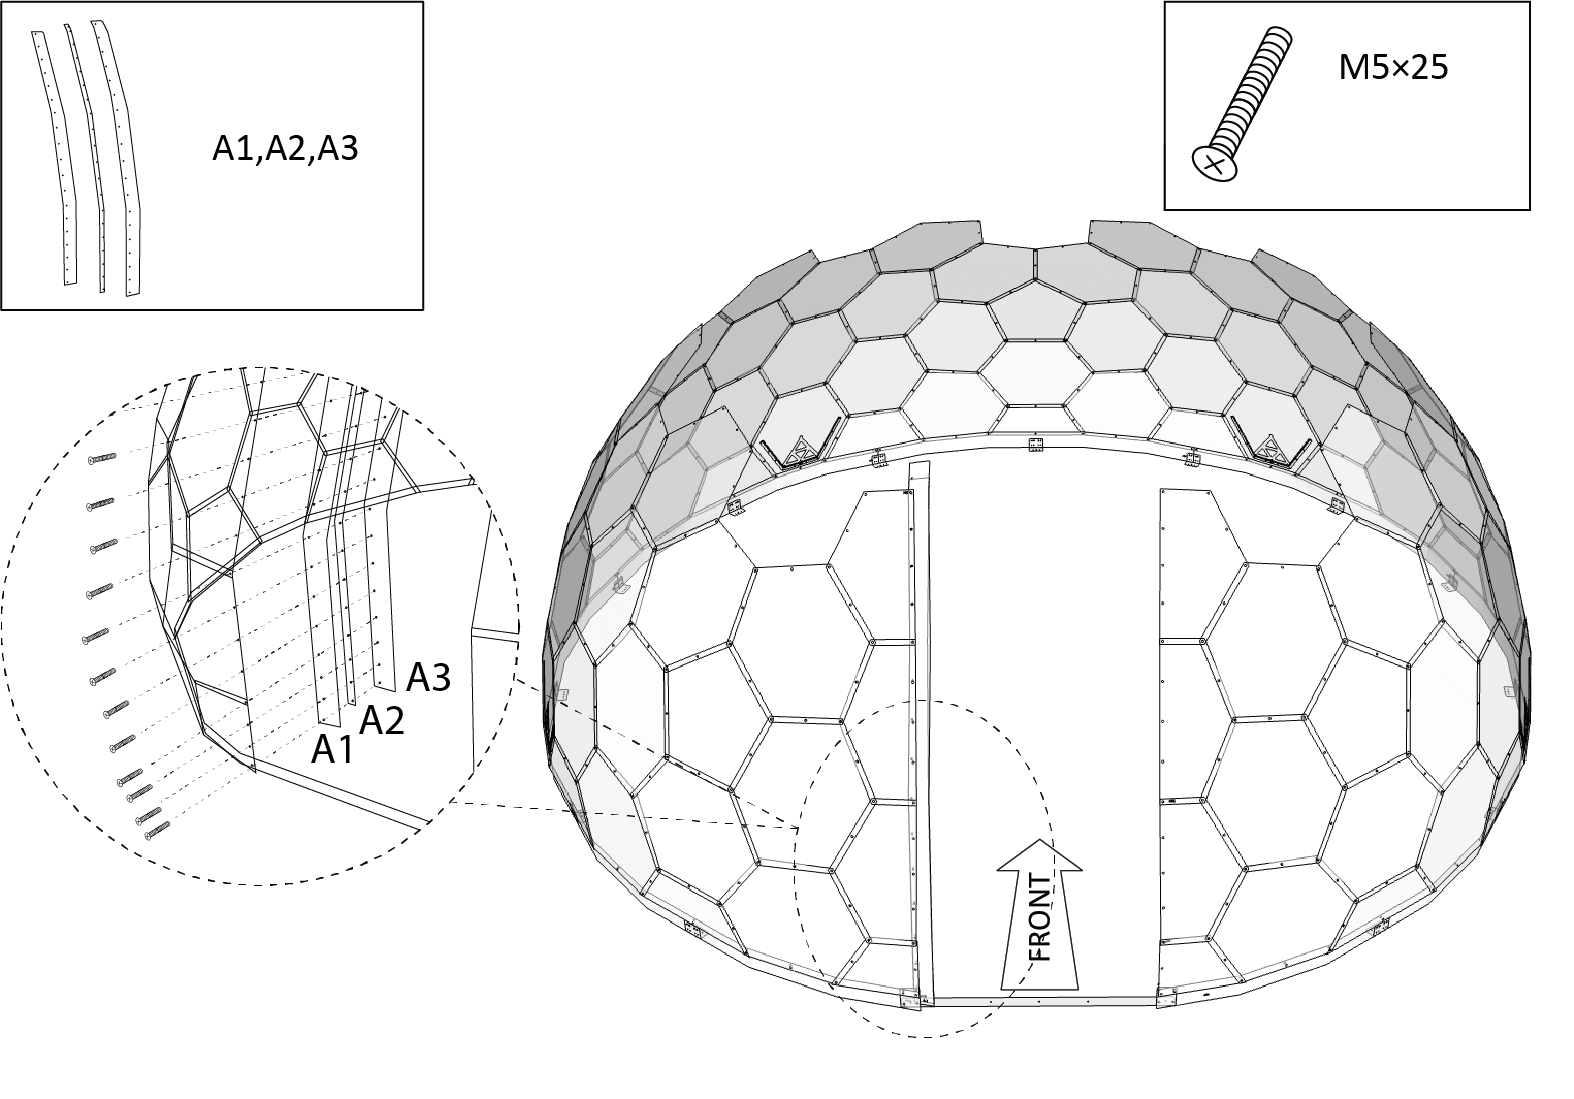
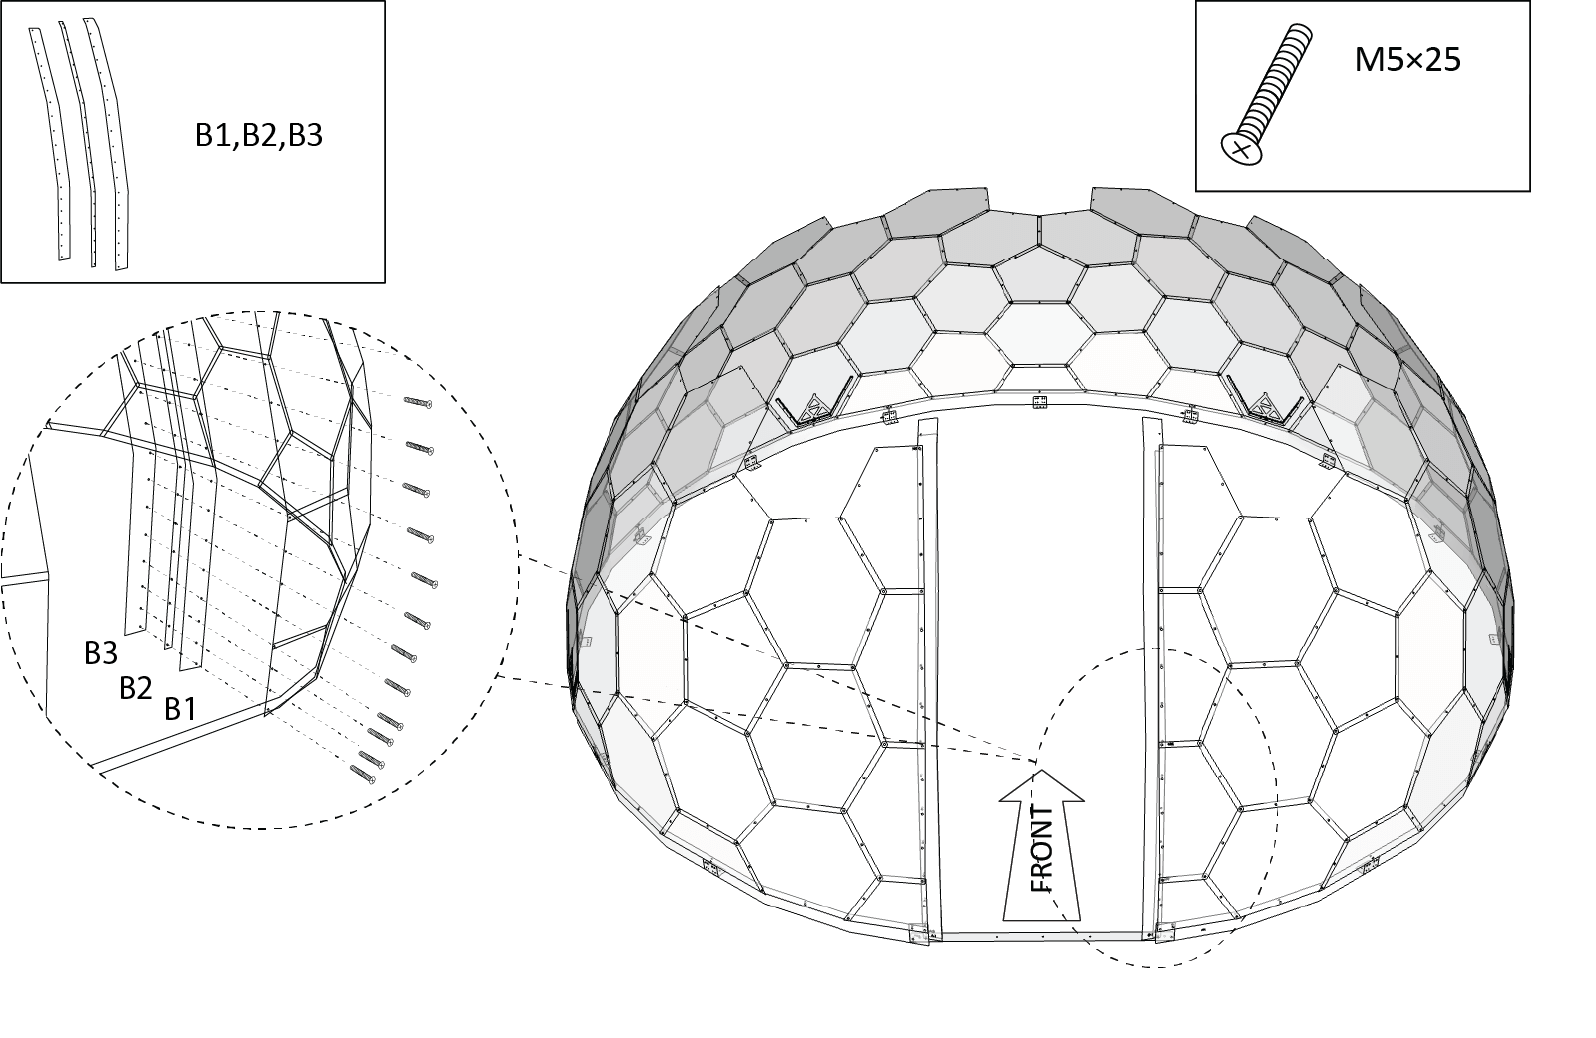
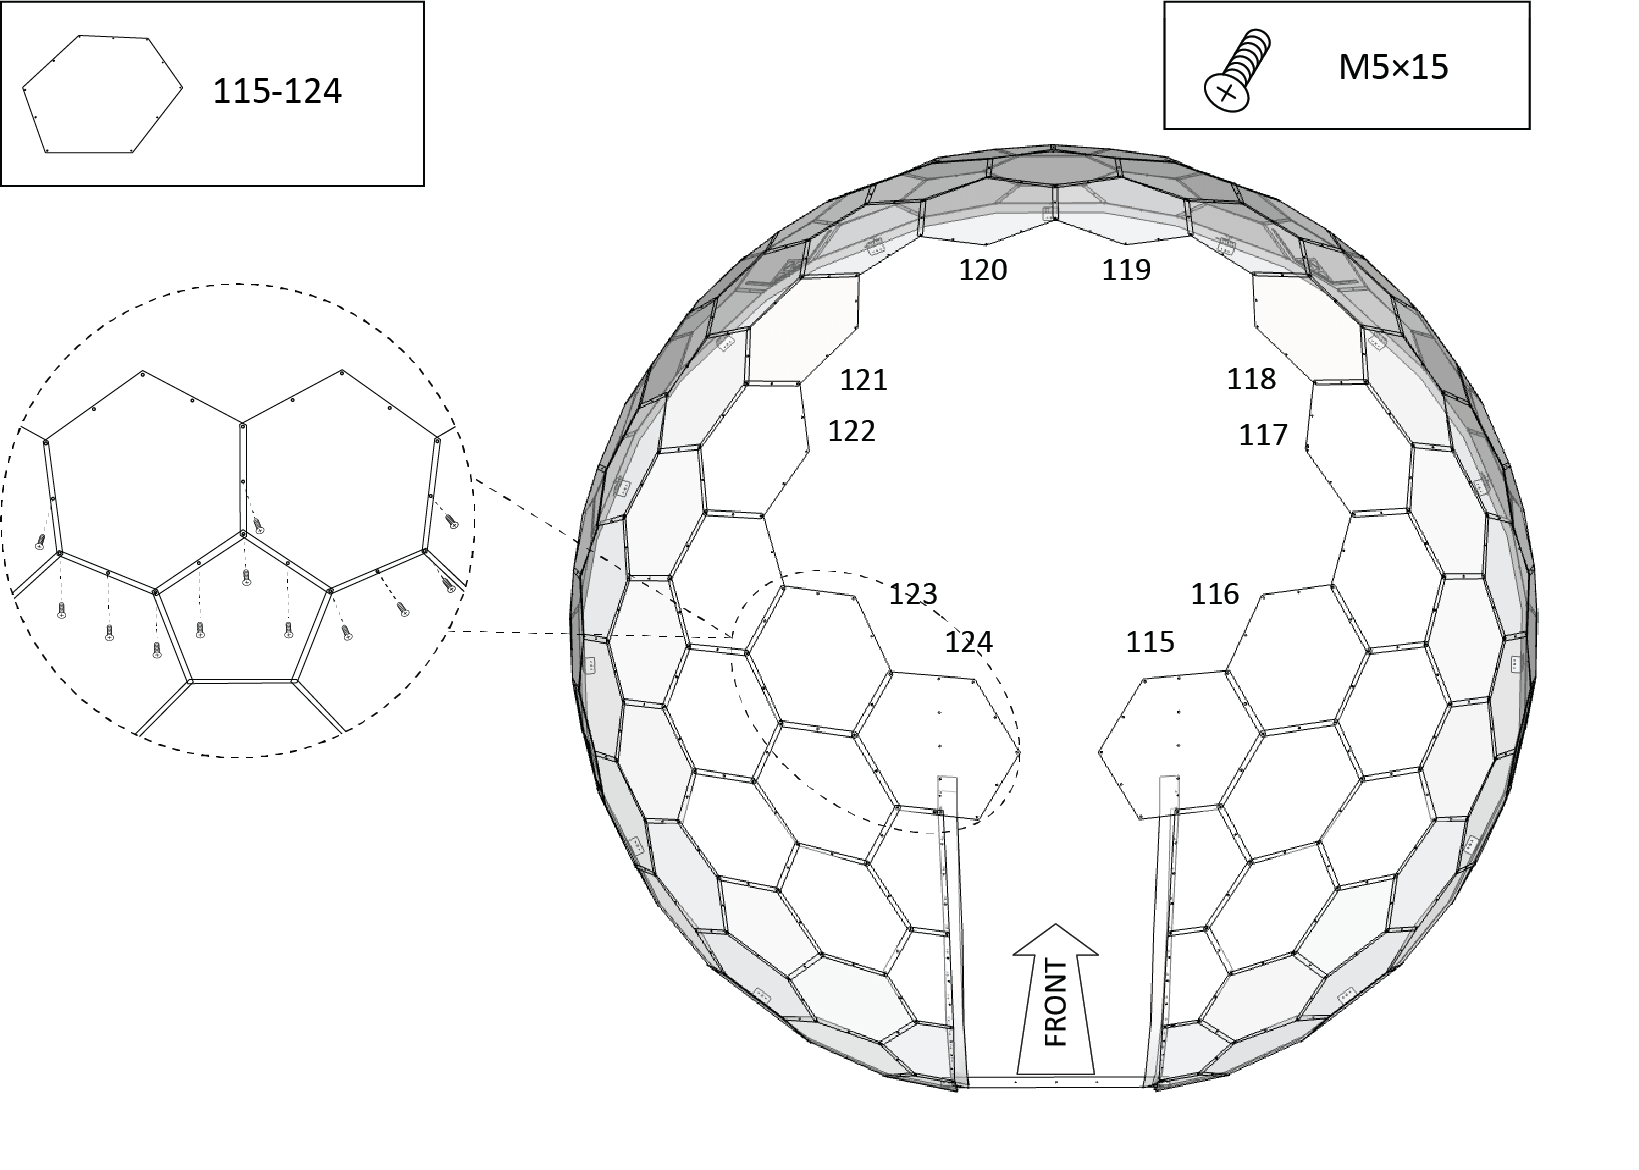
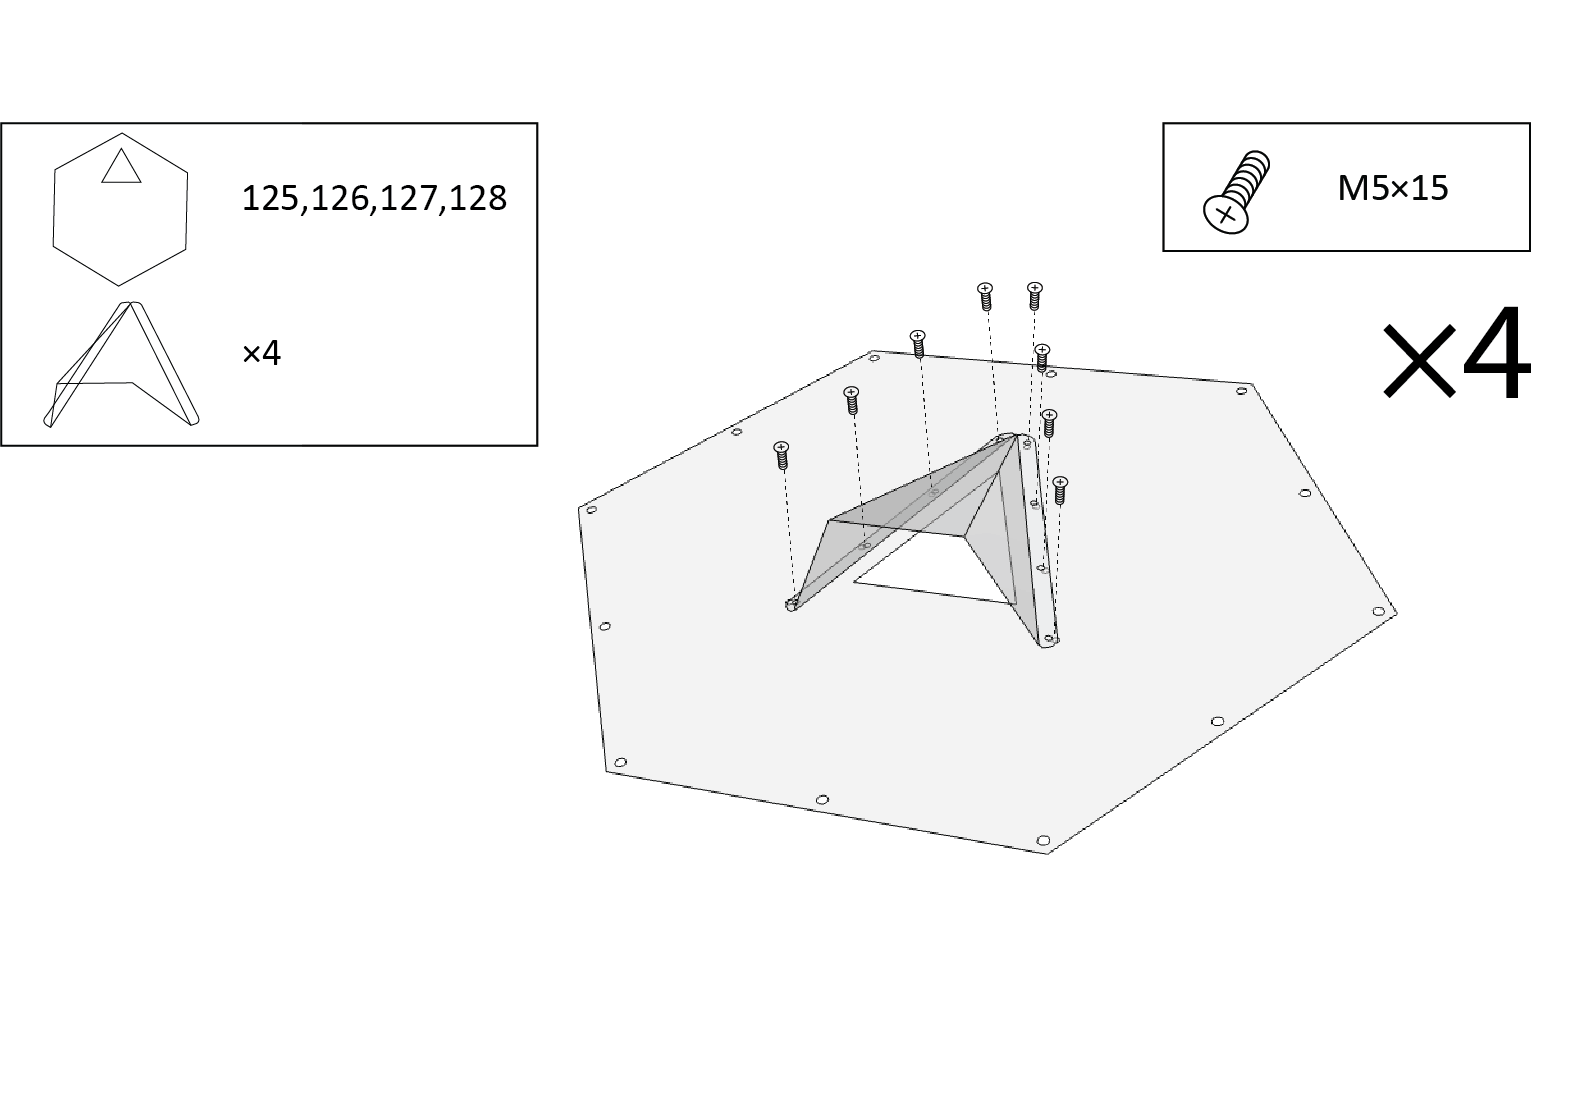
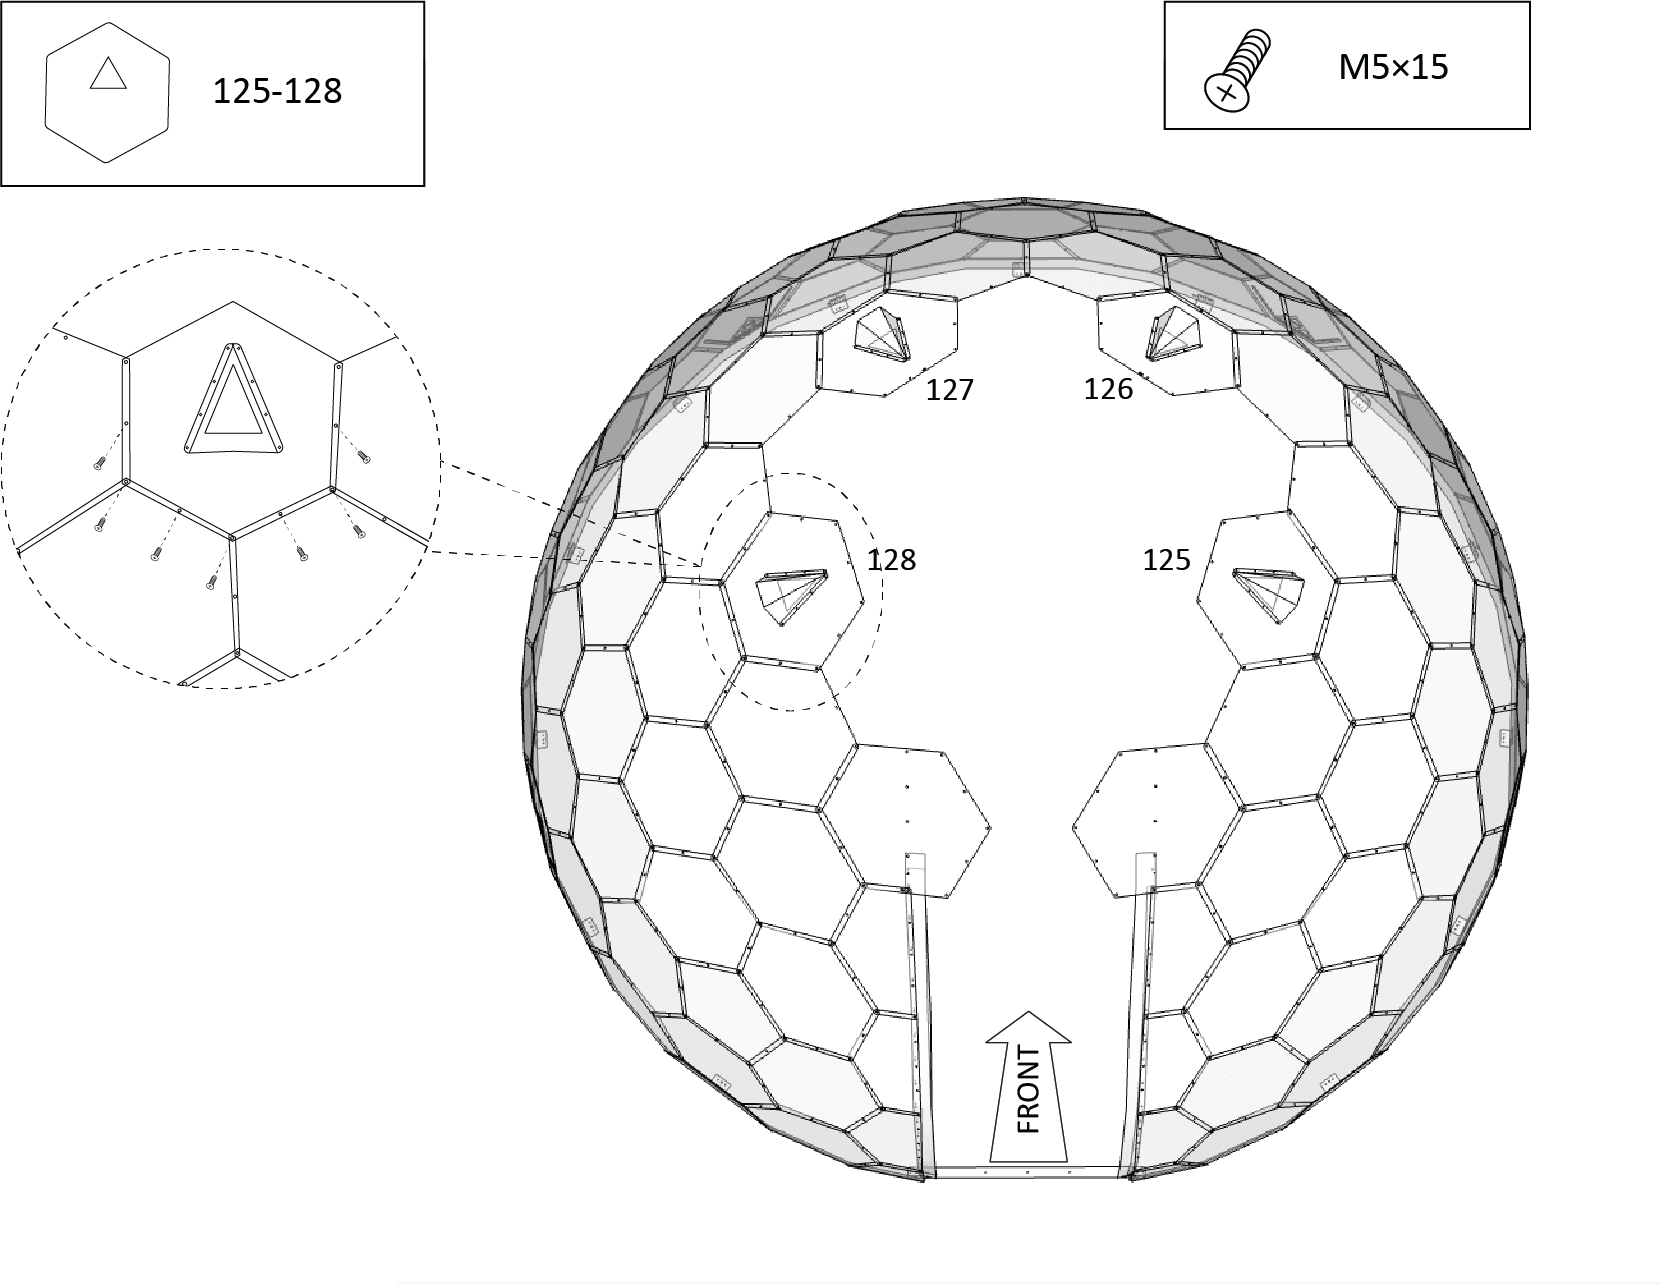
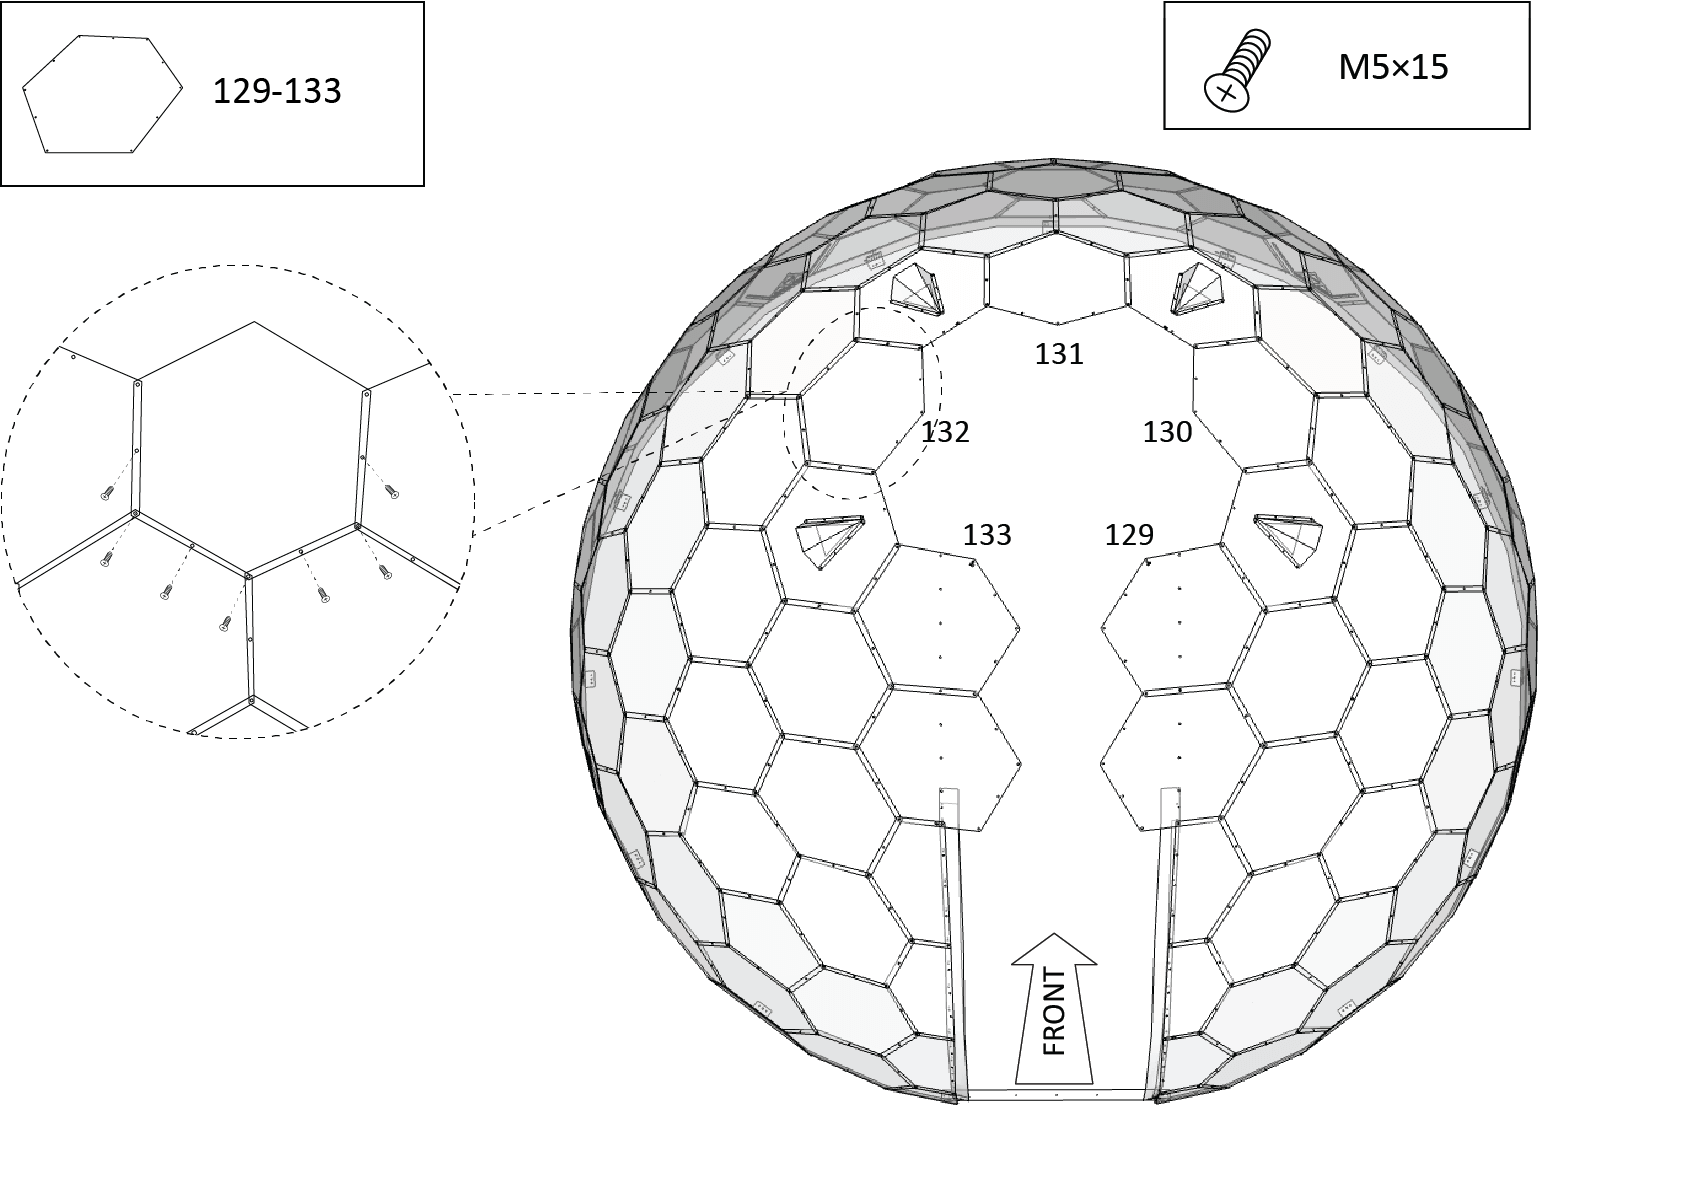
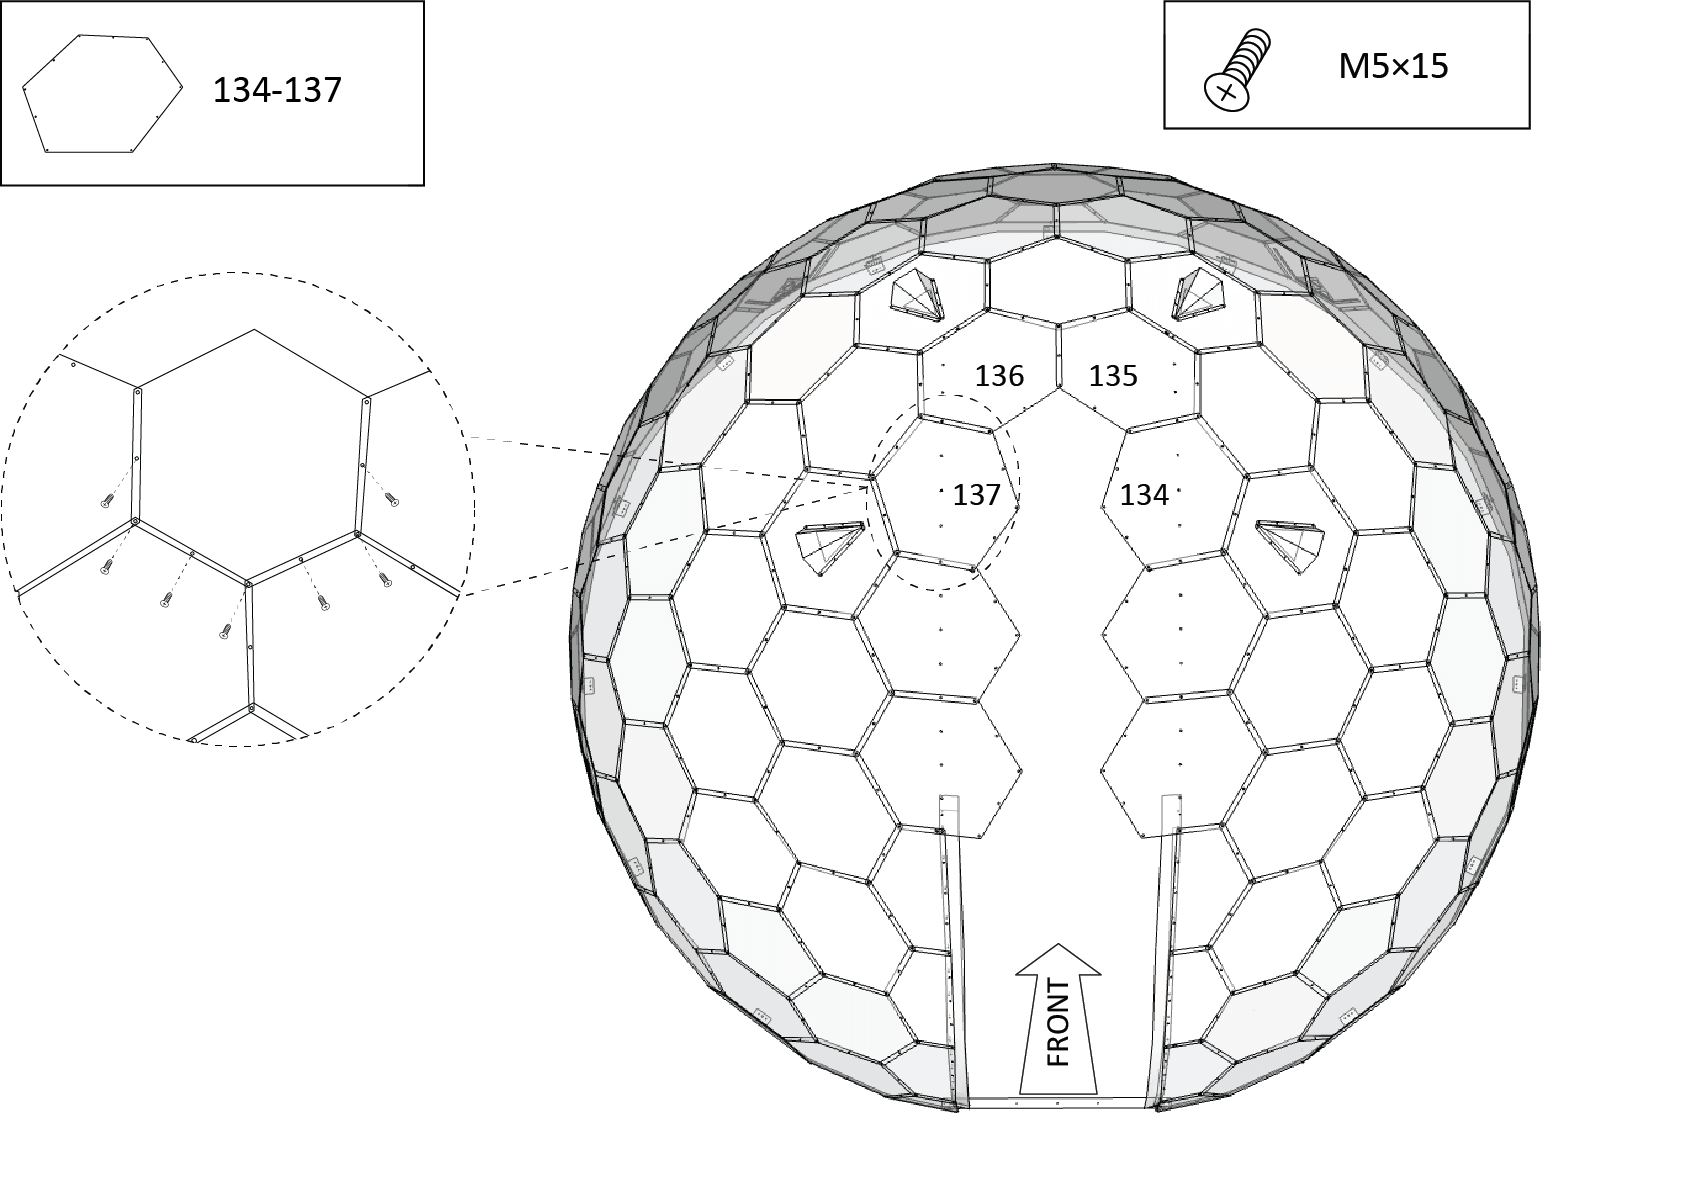
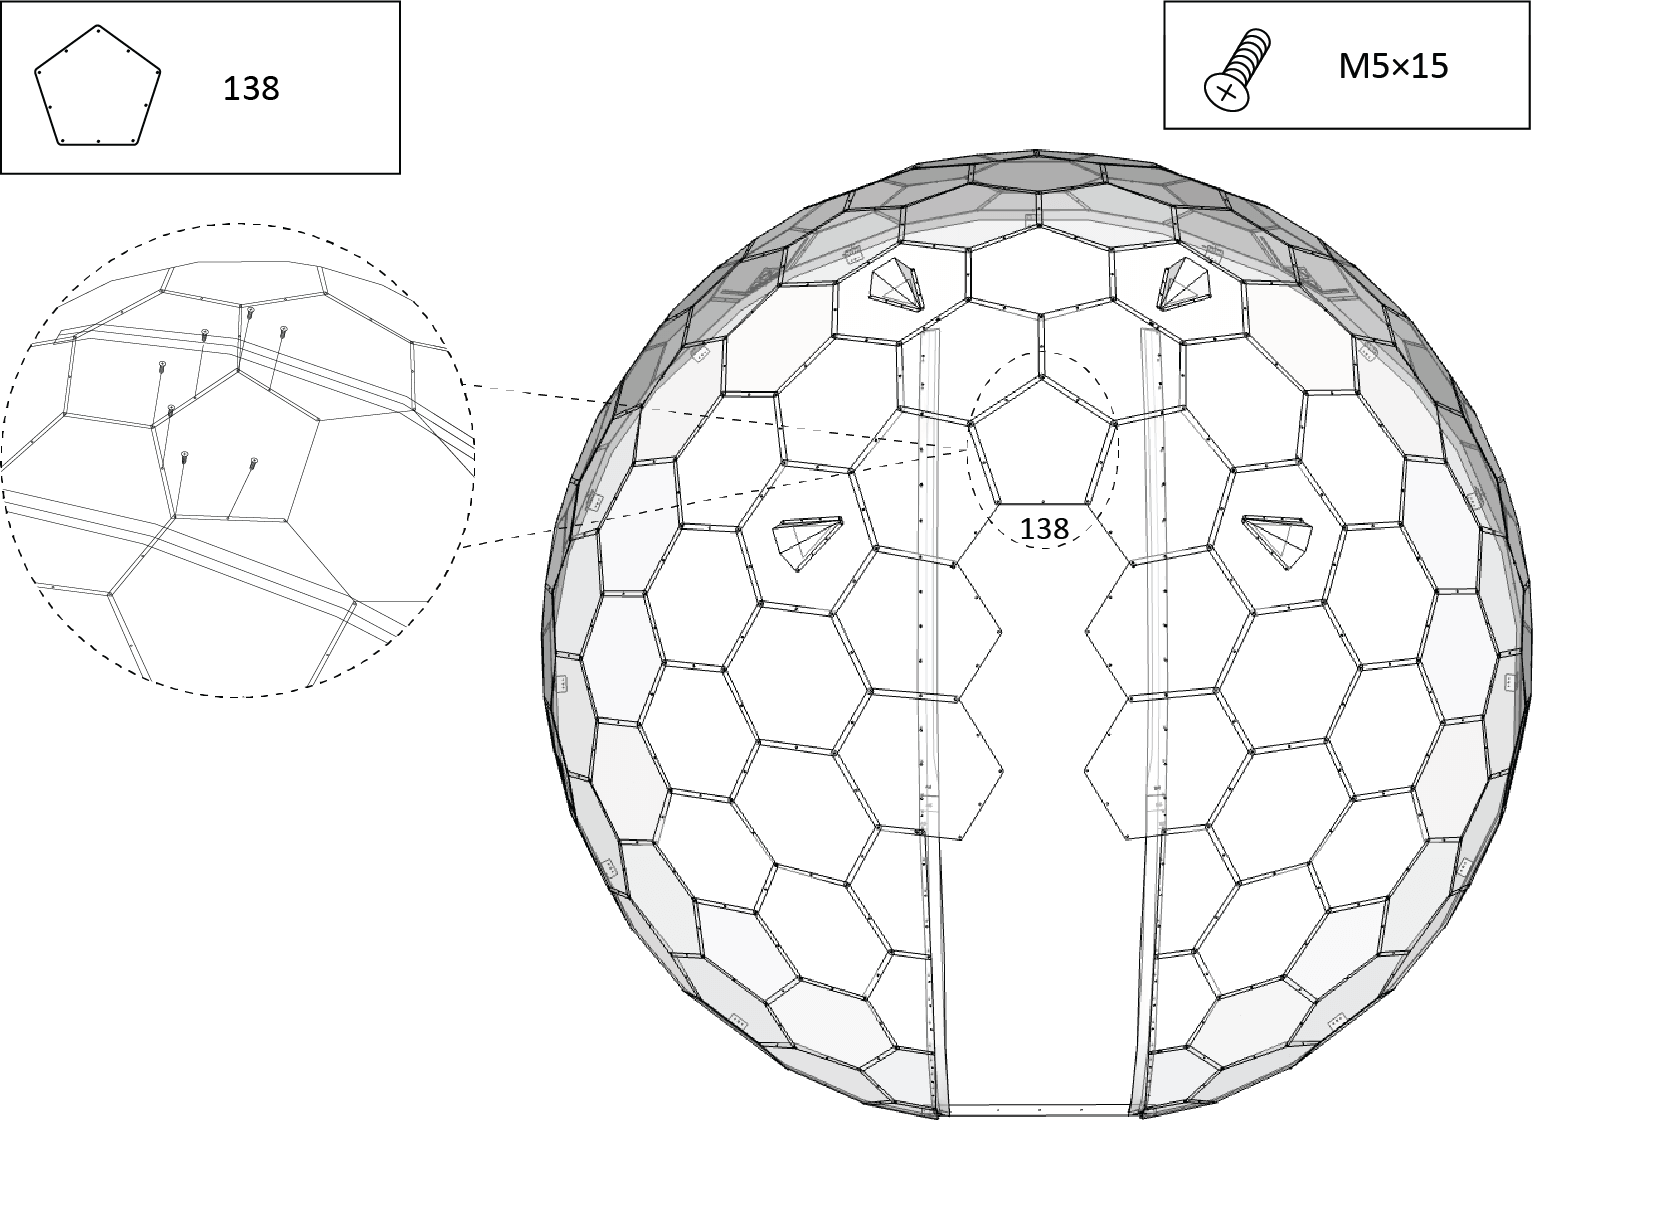
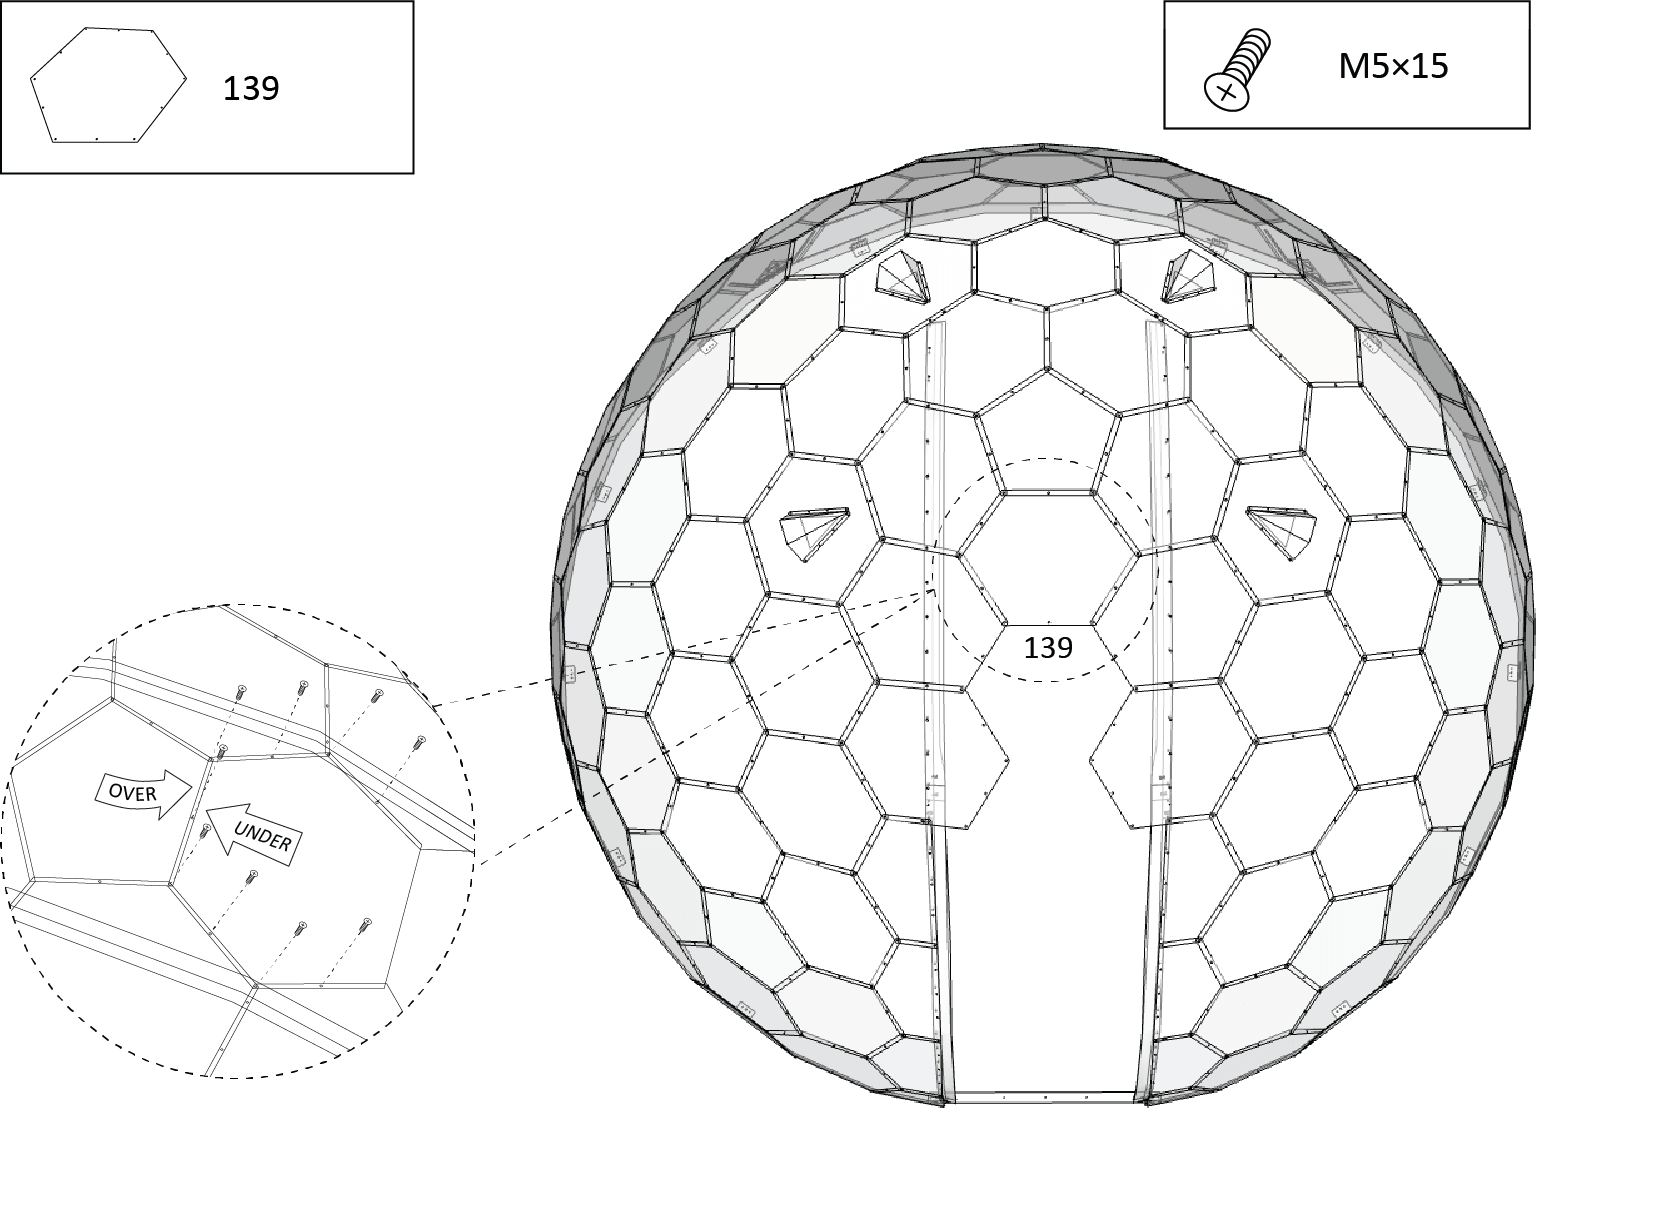
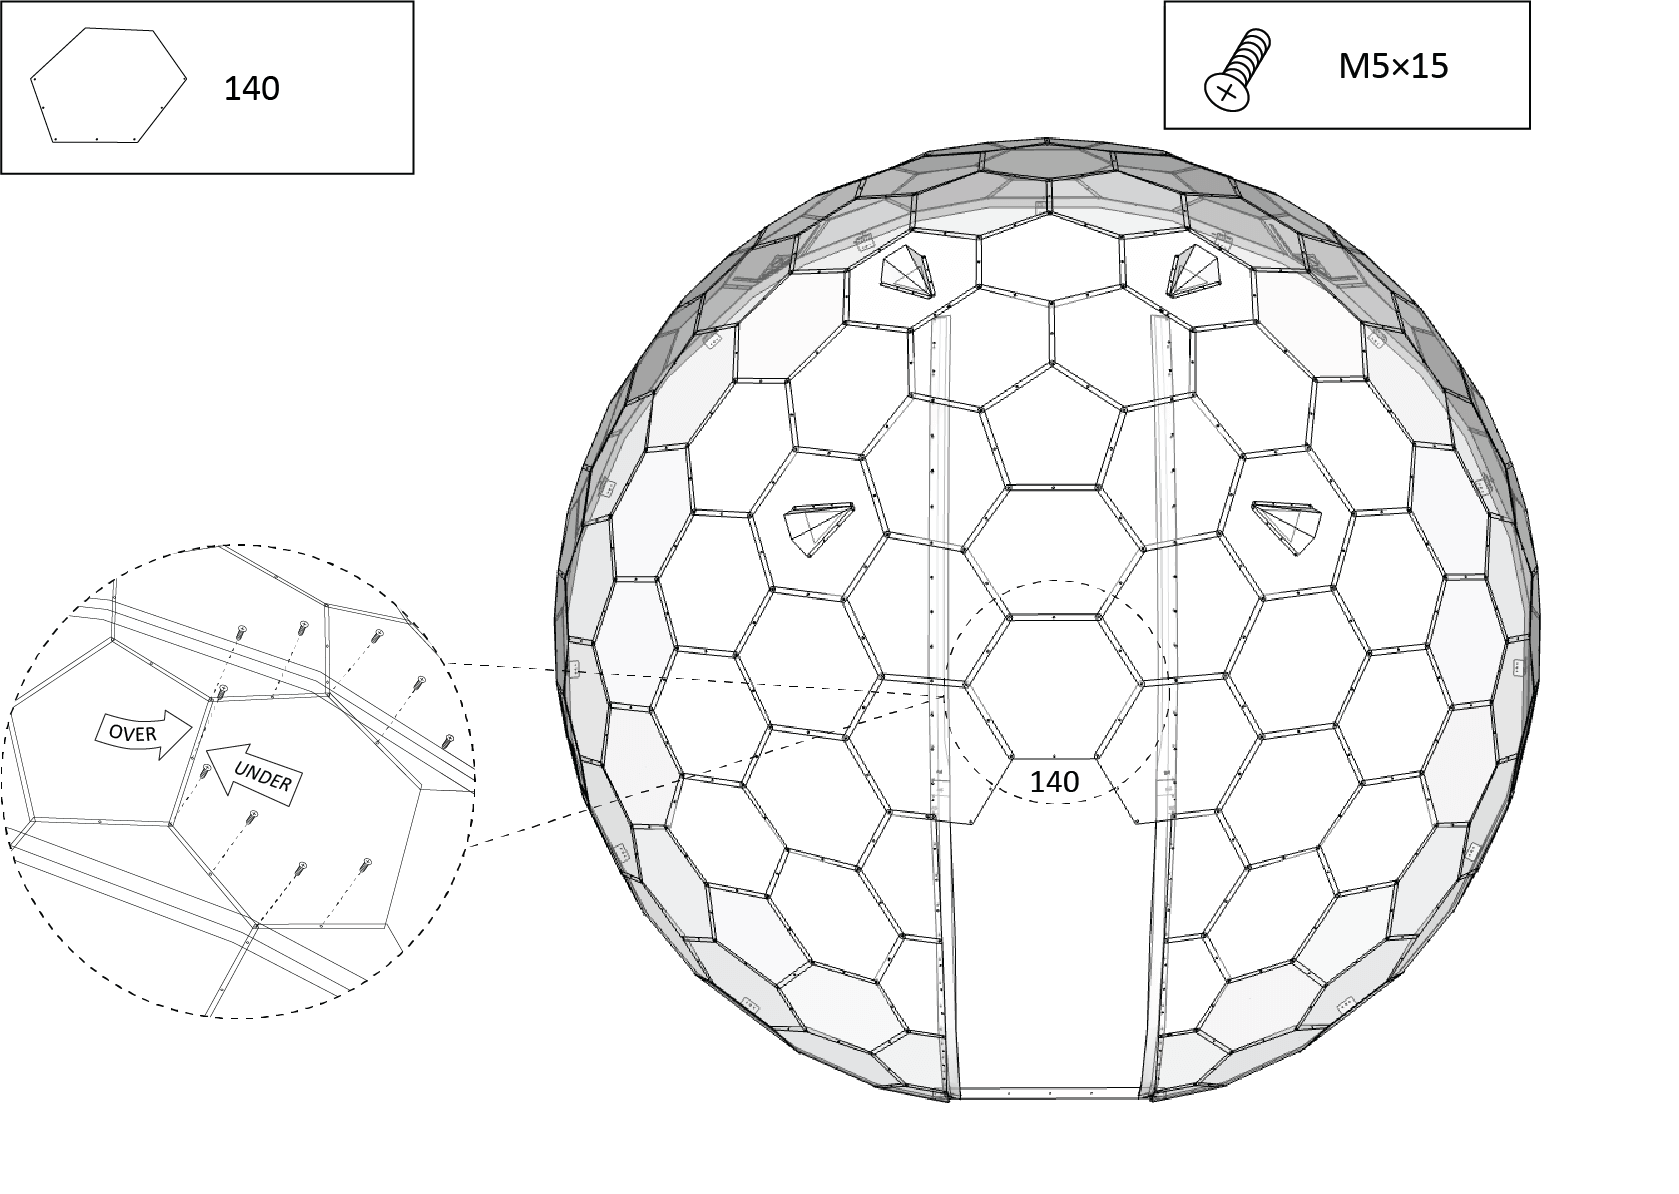
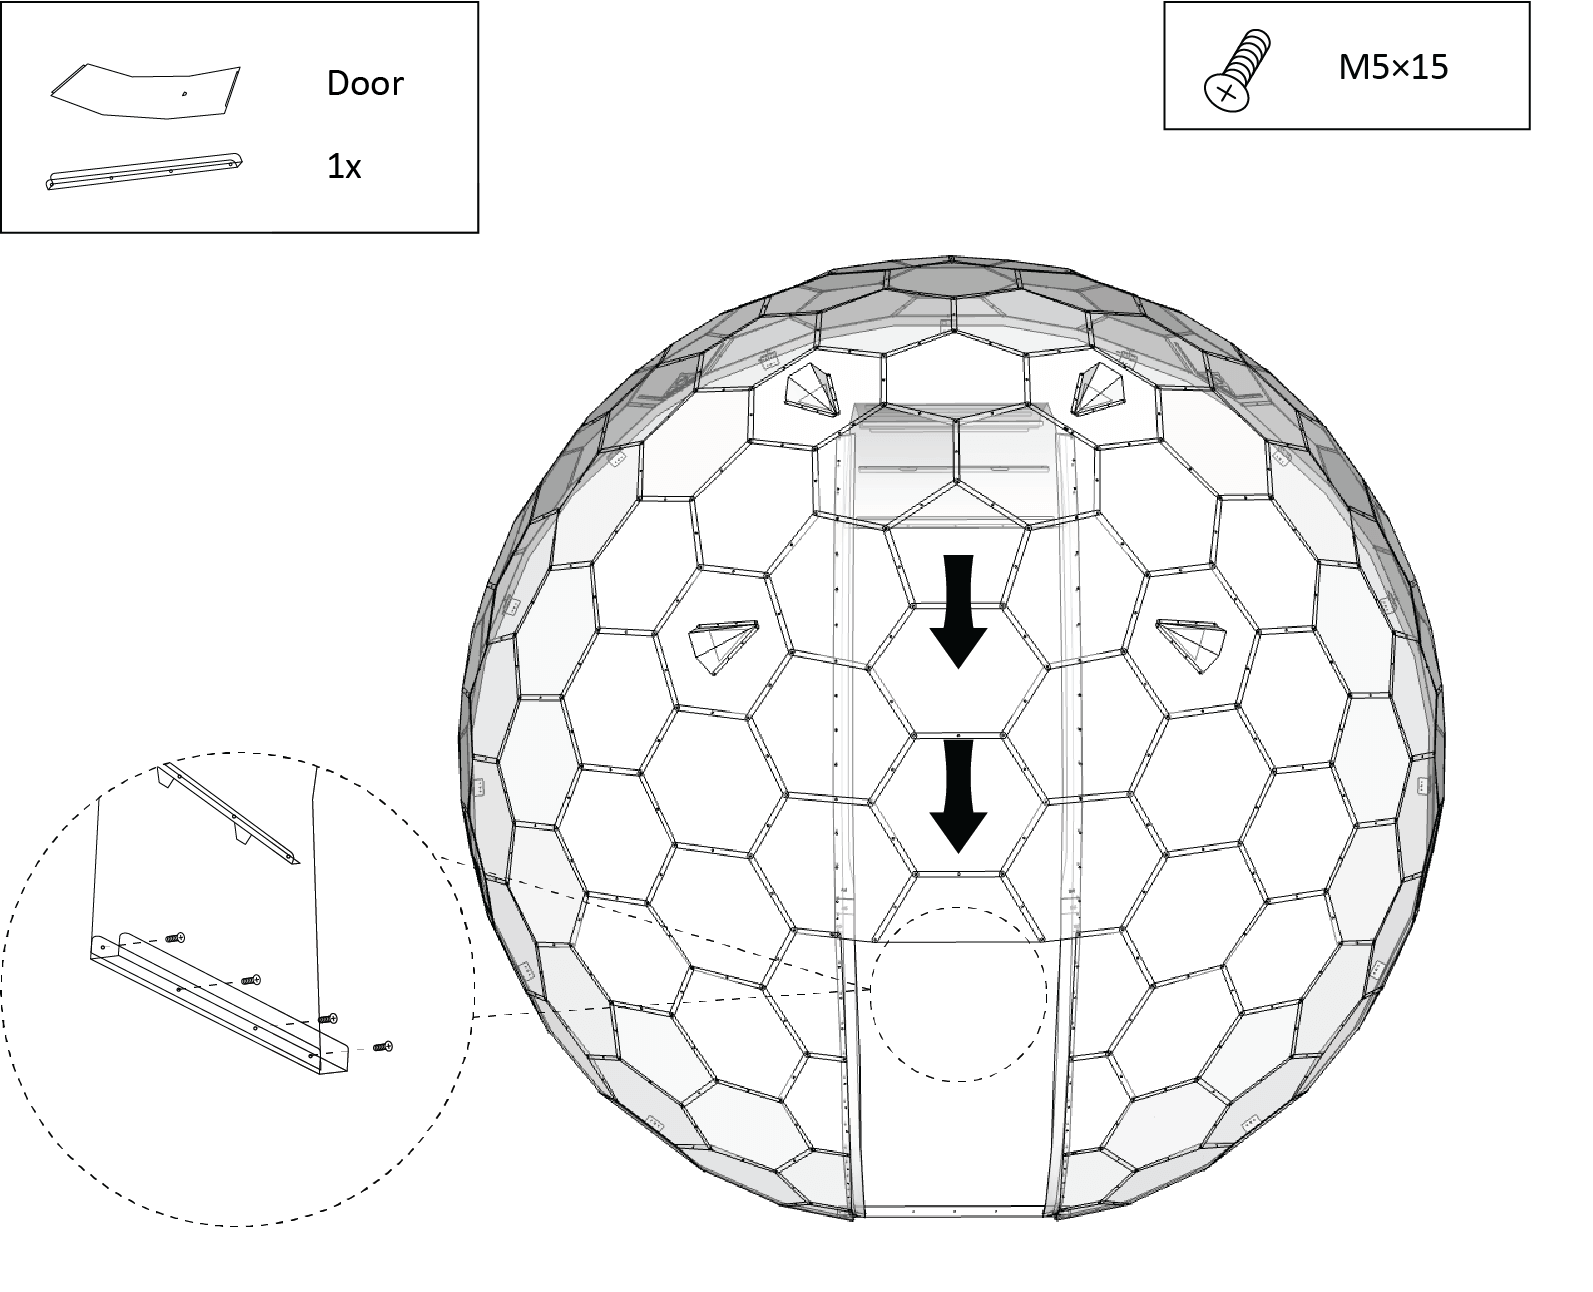
Assembly
How to build your dome.
Preparing your space
Step by step guidance


Title
Anchoring
How to attach the dome to the ground.
Video Chapters
Tools you will need

Tape Measure

Drill/Hammer
How to anchor your dome
Wood, Composite, Decking
Stone, Brick, Concrete, Paving, Tile
Step by step guidance
Troubleshooting
Title
Aftercare
How to look after your dome.
Looking after your dome video
Video Chapters
Prevention
Cleaning
Storing or relocating
Title